

Gorgeous Holiday Gourds and Gratitude
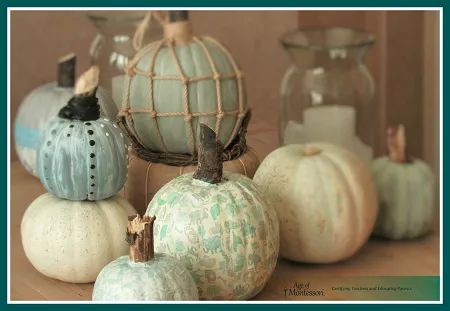
How to Make Gorgeous Holiday Gourds (from your old Halloween pumpkins)
The pumpkin: our favorite symbol of autumn's bountiful harvest: one of Nature's generous gifts and the impetus for our annual show of gratitude. T'is is the season to give thanks for these gifts among others, so why waste those gorgeous gourds just because Halloween is over? With a little paper and glue, or paint, or string, or whatever strikes your fancy, you and your kids can create these snazzy showpieces for your holiday decorating. Creating beautiful decorations, delicacies, and traditions together with children is such an integral part of any holiday celebration. And, children gain confidence, competence, and a sense of purpose through involvement with family projects and hands on activities.
Before we get started, I'd like to mention that this post is honored to be part of the 15 Days of Montessori for the Holidays blog hop series, a series filled with multicultural holiday activities and Montessori magic. Hop on over to the homepage at Montessori Bloggers Network to enjoy all the inspiring and helpful holiday ideas written by some of the best Montessori moms, teachers, and bloggers in the whole worldwide webosphere!
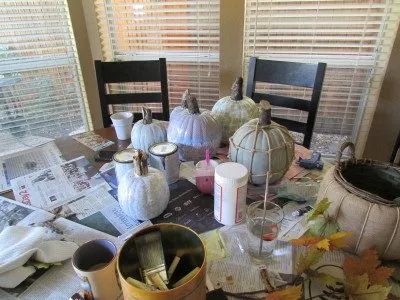
Now for all of these crafts, start out with pumpkins...any pumpkins. You can go to your local craft or dollar store and pick up those post-Halloween pumpkins (plastic, ceramic, cardboard, you-name-it) for pennies (Pssst, I just got back from the grocery store and those plastic trick-or-treat pumpkins were on sale for 10¢ a piece!) Or you can just use the extras you have collected over the season(s). Yes, you can certainly use real pumpkins, too.
First Up: Decoupage Pumpkins
This first pumpkin project is a great one to do in groups, especially because it is gloppy, sloppy, and very hands-on. While some children can't wait to get their hands in the goo, others are more sensitive to the tactile particulars and would prefer the less messy jobs. For younger children, I recommend using small pumpkins as the big ones can end up taking a long time. Of course, that depends on the attention span of each individual child.
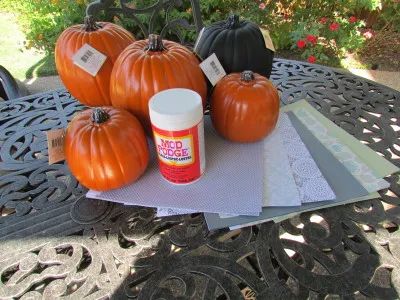
Step 1: Gather your materials.
- Pumpkin(s)--plastic, plaster, ceramic, real, whatever...Mod Podge will stick to nearly any surface.
- Mod Podge--(can be found at any crafts store, inexpensive, non-toxic, water washable, easy to use, all-around great stuff.)
- Foam paint brushes--these are super cheap, as in 15¢ a piece.
- Colored paper--here you can choose a theme, like Thanksgiving, or a particular color scheme, or just be random. You can choose to purchase pretty paper, or just use what you've got lying around: old wrapping paper, holiday napkins, torn up magazines, newspapers, etc.
- Optional: Branches for stems, ribbons, bangles, buttons, and other fun decorations.

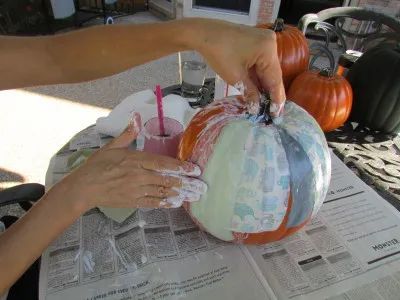
Step 2: Cut or tear the paper into strips or pieces. On a covered surface (this will get messy,) glue (with Modge Podge) the paper bits onto your pumpkin. Use the Mod Podge generously. First apply some Mod Podge to the pumpkin, then apply more to the back of the paper, then stick the paper onto the pumpkin and apply another coat of Mod Podge on top.
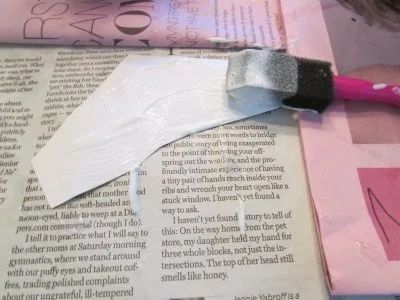
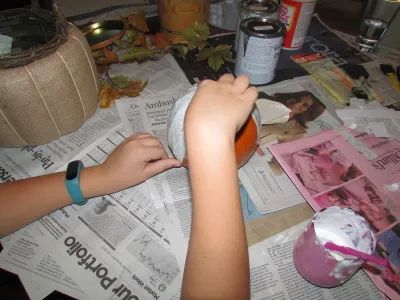
Step 3: Go back over your work with your fingers, pressing the paper and smoothing it down. If you have a large pumpkin, you will have to do this in increments because you want to smooth the Mod Podge before it dries. But don't worry, you really can't do it wrong. If you don't like the way something looks, just let it dry a bit and then go over it with another layer. Ba-da-bing!
Step 4: Cover the whole pumpkin and set it aside to dry completely.
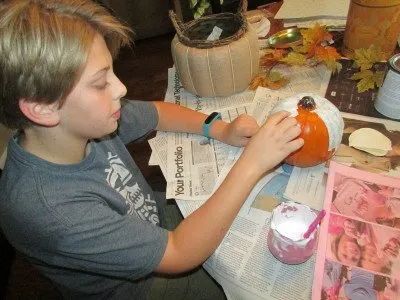
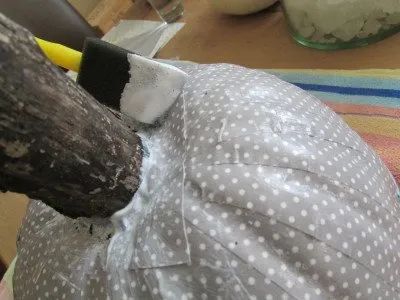
Step 5: After the Mod Podge dries (overnight is a good idea,) you can add the "optionals." I cut some dead branches with pruning shears and used a glue gun to attach them. I also used the pruning shears to remove the plastic stems already on the pumpkins. Some other options: paint the plastic stem, cover it with ribbon or raffia, or glue leaves (real or fabric) onto the stem.
Step 6: If necessary, go back with a little Mod Podge and paper to give a finished look around the stem. Optional: add stickers, ribbons, bangles, or beads. Make it your (and I'm taking to both adults and children, here) own expression of creativity!
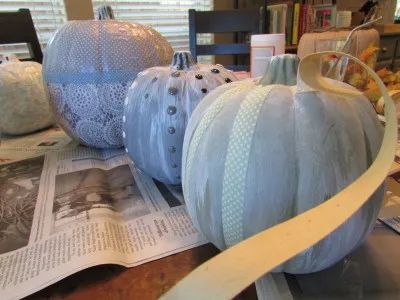
Round Two: Chalk Paint Pumpkins
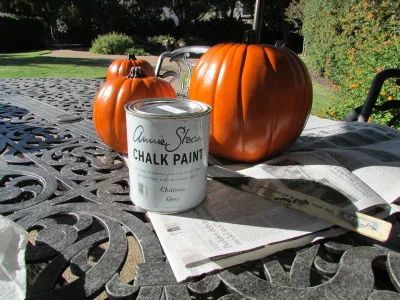
Step 1: Gather your materials.
- Pumpkin(s)--plastic, plaster, ceramic, real, whatever...
- Chalk paint--chalk paint is the greatest invention since the wheel, really! This stuff will stick to ANY surface, cleans up with soap and water, and is incredibly easy and forgiving to work with. The only draw back is that it can be expensive. Therefore, I am including a link for make your own chalk paint, here. And a less expensive chalk paint alternative, here. I happened to have some chalk paint left over from other projects so I am using green, grey, and white chalk paint.
- Paint brushes or foam paint brushes.


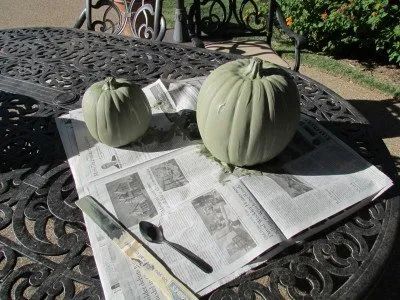
Step 2: Simply cover the pumpkin(s) with one coat of chalk paint and let it dry. (Chalk paint dries quickly.)
Step 3: Lightly apply a different-colored, second coat of paint and, almost immediately rub some of it off with a dry cloth.

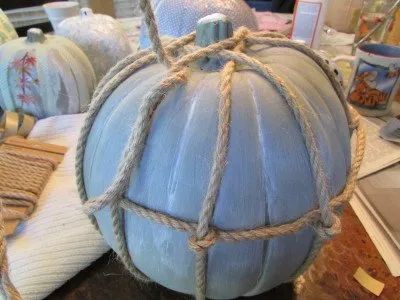
Step 4: For the pumpkin wrapped in string, start by wrapping the string around and around going top to bottom. Then "weave" one or two pieces running horizontally around the pumpkin.  Step 5: Staple in place on the underside.
 Step 6: Or decorate with buttons, ribbons, stickers, whatever!


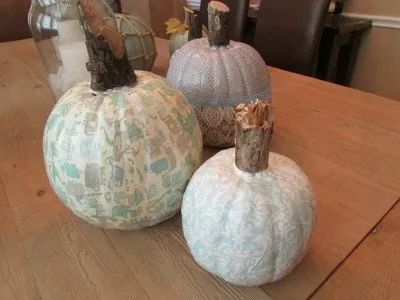
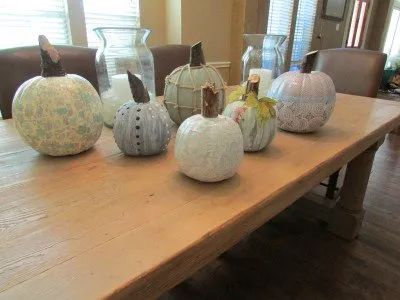
And last but not least, enjoy your beautiful creations and have a safe and happy holiday season!!!

Thank you for visiting! Don't miss this amazing series, 15 Days of Montessori for the Holidays, brought to you by over 15 fabulous Montessori bloggers. A new Montessori holiday themed blog post will be published each day from October 25 – November 11! Next up: Montessori Inspired DIY Christmas Ornaments by Montessori Nature, coming tomorrow!
 Photo Credit from the Montessori Messy Blog
The Montessori Notebook ~ Montessori by Mom
When Hippos Talk ~ Little Fingers at Work ~ At Kid Level
Magical Movement Company ~ Christian Montessori Network
Montessori Unfiltered ~ Mama's Happy Hive ~ Montessori Nature
Welcome to Mommyhood ~ Our Montessori Home
I Believe in Montessori ~ Living Montessori Now